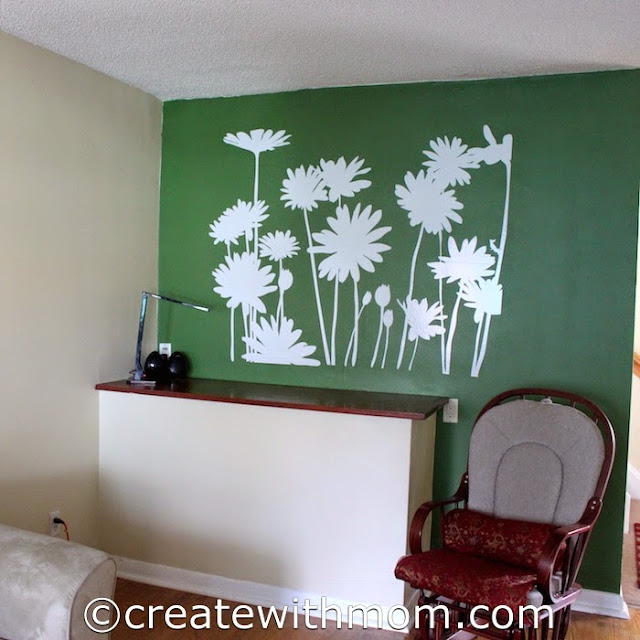
It has been a year since I placed a beautiful StickerBrand Wall Decal in our basement living and entertainment room, which we really like. I like how StickerBrand Wall Decals make my space feel special and unique. In our living room on the main floor we have an area that I find difficult to make functional and attractive, so I thought of using a StickerBrand Wall Decal to make this space livelier and to create a focal point.
Showing posts sorted by relevance for query wall. Sort by date Show all posts
Showing posts sorted by relevance for query wall. Sort by date Show all posts
December 29, 2014
January 4, 2013
Instant makeover using StickerBrand Wall Decals
The walls in our basement living room and entertaining area was bare and needed something to brighten it. I couldn't think of a solution for it until I saw the wonderful designs of StickerBrand Wall Decals.
 |
| Before |
The gallery and ideas in their site helped me to pick this Swirl flower floral design, as I thought this design would be suitable for our area. We can customize the StickerBrand measurements and colour to our preference. I chose 38" tall x 125" wide design in black as our walls are painted white.
I found the ordering process simple and clear. It was easy to navigate the site and choose, especially because there are pictures of how the design looks in an area.
The vinyl wall decals are removable, but it cannot be re-positioned so plan before placing it. We placed the decal with the backing sheet using tape to see how and where we want the design before peeling and sticking it.
Even though the decal I chose is a big design, it was easy to work with as it came in workable small sections. Each section was labeled so there was no confusion on how the design looks. The decal also came with a sheet that suggested how to place the design, but we could paste it however we see fit. I placed the design differently than the suggested way.
StickerBrand suggests that we wait for at least 2 weeks prior to placing the decal on freshly painted walls, as there may be invisible air pockets that may prevent the decals from sticking.
- Before starting the project the walls must be dust free. To help the peeling process we kept the design with the peel facing down and rubbed the pattern using a credit card.
- Then we placed the design on the space we wanted and slowly peeled it while making sure the design was sticking on our wooden panel walls.
- We rubbed some small spots gently using our fingers so it pasted well. We didn't need glue or other chemicals to place it.
The variety of StickerBrand decals can be applied to most flat surfaces, slightly textured walls, windows, mirrors, tiles, bathroom walls or any smooth surface including our vehicles. If a regular sticker sticks then StickerBrand products will stick. The decals are supposed to work well on matt-finish or semi-gloss wall paint.
 |
| After |
StickerBrand adds new designs weekly and is sold online, so we can order from anywhere in the world. After the wall decal was placed the whole area was instantly changed. Now the space looks lively and the decals give it an artistic flair. Family and friends that came over said how beautiful and bright the walls look. I too like looking up at the wall and admiring it :)
We can ask for our own image or design to be customized to a wall decal. StickerBrand also has printed graphic decals and wall murals that can be removed and repositioned unlike the vinyl wall decal I have used. StickerBrand products are wonderful in any home or office, and it is easy to be placed by anyone.
Offer:
When we sign up for their Free VIP membership we get an instant 15% coupon that can be used within 30 days to purchase any of their 2500+ wall decals.
All rights reserved on photographs and written content Createwithmom © 2011 - 2013. Please Ask First
January 10, 2021
How to colour wash a focal wall

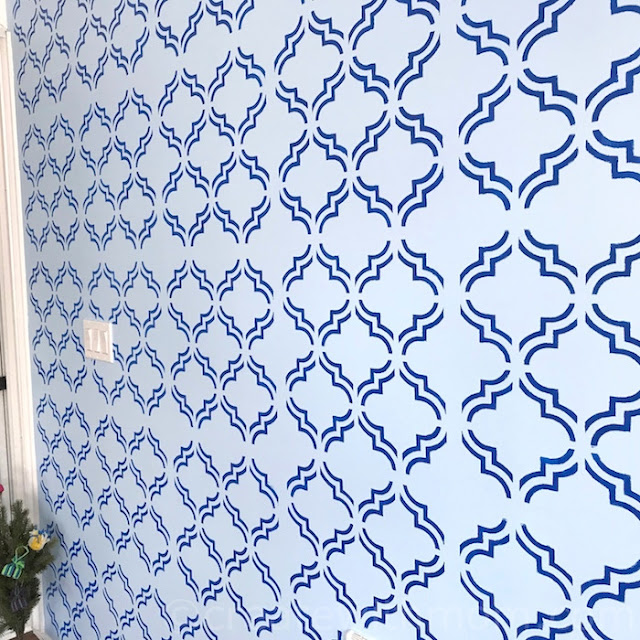
We had this DIY stencil wall for about three years now and wanted to change the look of this room by adding more indoor plants. With the indoor plants hanging the wall looked a little crowded, so we changed it up with this easy and fun colour wash technique. Depending on the lighting, this room looks different and beautiful in person.
January 4, 2018
DIY Stencil Wall Art
We changed a wall space in our home using the Moroccan Tile Stencil from DecoArt. These washable and reusable 18" x 18" stencils are a fun way to add colour to any surface from walls to rugs and furniture. The stencils are available in different sizes, so we can use it on different surfaces for both small and large projects.
November 20, 2017
Adding Colour using wall mural and canvas prints from Photowall
Photowall.com, a Swedish brand which has a selection of wall mural and canvas prints we can use to add a different decor to any area in our home. We really like how these murals and canvas prints add dimension to our wall and changes the focal point, and the interior design of the space.
March 26, 2016
October 30, 2020
Bring Style and Decor with Photowall

If you are looking for a way to change up your decor, bring creativity to your home and give a fun unique look to any wall in your home, then you must take a look at Photowall.
October 31, 2023
Budget-friendly Guide to Decorate Your Teens Room

As parents, watching our children transition into their teenage years can bring a mixture of pride and trepidation. They're carving out their identities, seeking independence, and wanting to get a space that reflects their evolving tastes and personalities. But where does one even begin to create a room that keeps up with their ever-changing preferences? And how do we do it without burning a hole in the pocket?
September 11, 2012
Wallpops calendar
Do you sometimes feel like you don't remember what is on when, and can't find the date book on time so you forget important things and end up missing it? Well this keeps happening to me, so I am glad I started using Wallpops!
After using these decorative Wallpops, I found it easier to stay organized. This is an eco-friendly solution compared to the paper calendars.
I found it easy to write it down the important things that were coming up 4 months at a time. I placed it closer to my work area so it was on the wall loud and clear. It looks pretty and efficient.
It was easier for other family members to put down things that might be important for all of us to see so we are all on the same page and won't have conflicting things to attend on the same day, which usually happens :)
 |
Zinnia 4 piece calendar set |
It is easy to peel and stick the Wallpops vertically on a smooth wall. These decorative calendars do not spoil or damage the wall. Wallpops can easily be removed and replaced in a different place if needed. Each calendar in this kit is 13"x 13". It is made in USA.
These 4 calendars come with a dry eraser marker that has a small peel and stick gadget to make it stick on the wall for convenience. After a few hours, some of the writing done with the marker faintly went off; this didn't bother me too much because the writing was still visible.
As always with life, dates change so having an erasable calendar like this keeps things clean and organized without confusion.
If you are looking for a fun, functional way to keep yourself and your family stay organized without forgetting important things then take a look at the wide selection of Wallpops, which are available at office supply stores and online.
Wallpops are a wonderful solution to stay organized. Here is short video of the wall pops.
November 25, 2012
Our kitchen renovation DIY project using Aspect metal
We renovated our kitchen and changed how our kitchen looks using Aspect Metal peel and stick tiles. This DIY project was very exciting as it changed the whole look of our kitchen giving it a sleek, sophisticated, modern and a clean feel that we really like. My husband did all the work on his own and completed the project within a couple of days during the weekend. The project would have been completed sooner, however because of time limitations he did the project a little bit at a time.
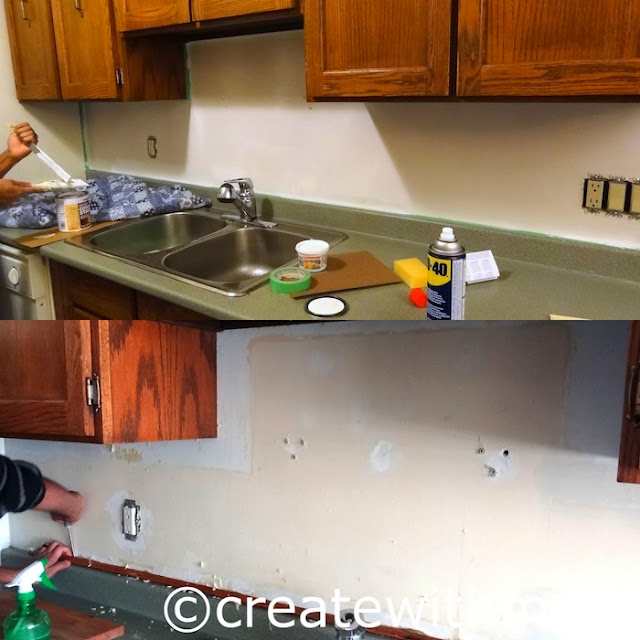
We had wallpaper prior to doing this project and had a few prep work to do. He removed the wallpaper, cleaned it up, fixed up the wall, primed it with an oil based primer and left it to completely dry before starting to paste the tiles. The instruction that came with the tiles said that it would work well only on flat, primed, smooth walls so we wanted to make sure the wall was perfectly ready :) We read the instructions very carefully twice before starting and I highly recommend this. The video on this site is also very helpful to watch before starting the project.
The instructions on the tile box has a list of tools we may need.
We used...
hacksaw for the large pieces
chisel for small pieces
sandpaper to smoothen the sharp cuts
utility knife
pencil, paper, cloth, primer, brush
adhesive glue
drill (only needed if want to put any shelves or screws for hanging purposes)
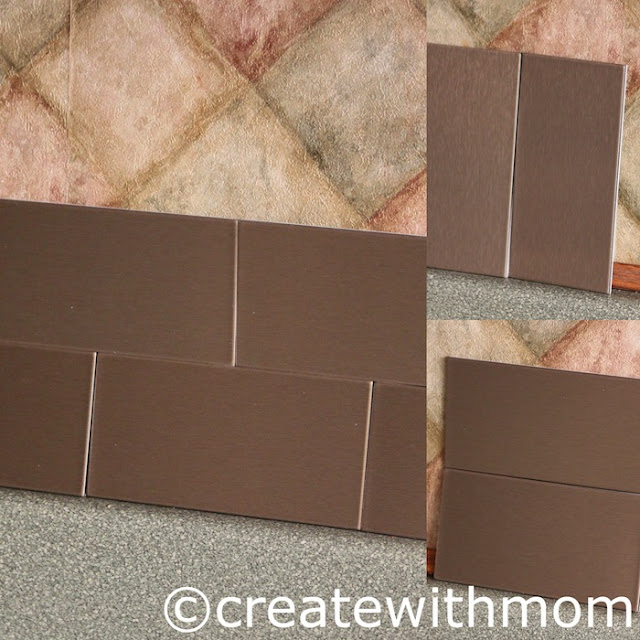
Before sticking the tiles we measured, then measured again and decided that the subway pattern was most suitable for us. There were lots of design ideas online as well as on the instruction sheet, which was helpful.
My husband drew the middle line before pasting the tiles starting from the centre and out. He also did the bottom row close to the counter to make sure the tiles will be aligned correctly.
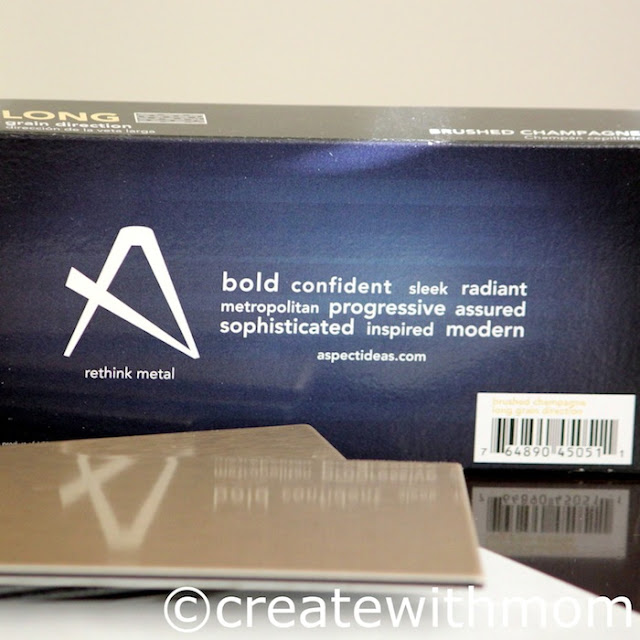
We chose the long grain, brushed champagne tiles. Each box has 8 tiles that are 3"x6", and to cover our area we needed 12 boxes.
When doing this projects we encourage and recommend that...
- You measure everything twice :)
- When cutting think about the grain because if the grains are not in the same direction it will look different depending on the lighting and angle; unless you want the different shades as part of your decor
- Use glue adhesive to stick the tiles it is better in the long run
- Remove the film on the front just before placing so the tiles don't get any scratches
- Throw away the front and back peel immediately to avoid slipping on these
- Start from the centre so the pattern will flow and look good
- We wanted to put a shelf so we had to make holes into the tiles so we drew the location of the holes first on a piece of paper then made the points on the tile and carefully drilled it
- After cutting don't skip on sanding the edges
- We can use a clear or coloured caulk to seal around the bottom and edges
- Get matching switch plates, this is something we forgot and had to hurry to Home Depot :) and found decor wall plates from Atron. The Aspect tiles site recommends outlet covers from Wall Plate Warehouse.
There are lots of pros in using these Aspect Metal tiles:
- The look is fabulous and gives the space a contemparary feel.
- Instantly adds a whole new beautiful look, which also adds value to the space.
- A modern look with the metal for an affordable price and a fraction of the cost compared to using real tiles.
- We can do it ourself and not have to pay contractors and experts.
- Easy to maintain and clean by simply wiping it with a soft cloth.
- The tiles are eco-friendly as it made with 50% recycled materials and the tiles are 100% recyclable
- There is a good choice of colour we can choose from; brushed champagne, stainless, copper and bronze.
- There are two types of grains we can choose from long or short grain.
- Once the project is complete we will feel really good :)
My husband really enjoyed the whole process and he says he liked how he felt when every tile was placed :) which is good news for me as I can think of other projects to do. My children and family/friends who came said how good it looks. My four year old suggests that we decorate the entire living room with these tiles :)
These tiles are available online and at home hardware stores such as Home Depot. Aspect metal tiles will look good as backsplash, in small areas of the wall to add accent, in cabinets and to put detail around fireplace etc. We really enjoyed the process of doing this project and are enjoying how good the kitchen looks now. If you are thinking of doing something to spice up your kitchen or other areas around the home think metal and choose these tiles from Aspect ideas.
All rights reserved on photographs and written content Createwithmom © 2012. Please Ask First
Updated September 3, 2015 In Reply to a question from a reader (Thank you Stacey):
Was curious how they have held up. More info about the additional glue you used would also be interesting. Did you take the foam backer off first?
Answer
The Aspect tiles are holding up great since we placed them in 2012. We did a kitchen renovation (Cabinet transformation) and decided to keep the aspect tiles because it still looks new. We did not remove the foam backing as it is not supposed to be removed just the peel from the sticker was removed before each tile was pasted. There is a film protecting the tiles which was removed after the tiles were installed. The glue that was on the peel off wasn't as strong (the items in 2012), so I used the "Weldbond" universal adhesive that can be found at Homedepot or Lowes, you could use any construction adhesive. I primed the wall before installation so the tiles stuck firm.
Also another tip, if you need to cut the tile its best to use a utility knife and keep scoring it and then snap off.
May 16, 2021
Practical Ways to Enhance Your Home's Front Entry
The front entry gives visitors an impression of your home. An excellent entryway welcomes visitors and family into your home, while separating it from the outside world. These four practical tips ensure you have a terrific entryway.
July 4, 2013
Summer Adventure At Horseshoe Resort
Horseshoe Resort isn't only fun in the winter, but also in the summer. We spent a fun filled day at Horseshoe Resort Adventure Park by rolling down the hill inside their water filled OGO, climbing rocks, golfing, running through the maze and more. It is a fabulous place to do family friendly activities that promote learning and discovery.
December 18, 2014
Children's Bedroom Renovation with Sherwin-Williams Paint
 |
| After picture, still personalizing the wall |
Our recent project was to update and renovate the children's bedroom. I chose the Shagreen Sherwin-Williams' Emerald paint for the walls, and the cotton white and creamy white for the ceiling, trims and door.
February 16, 2015
Completion of Our #KitchenReno and Painting with Para Paints
I am glad we completed our mostly DIY #KitchenReno project. We fixed the vent, tiled the floor, transformed the cabinets with Rust-Oleum, organized the drawers in the kitchen with Rev-A-Shelf, installed the Delta Touch2O Technology Faucet, and chose quartz for the countertops. I chose the coin silver grey from Para paints for the kitchen wall, and two different shades of white for the ceiling and trims.
January 13, 2016
July 15, 2015
Kanex MiColor Accessories
With a lot of Apple devices in the household you cannot have too many lightning cables. Standard Lightning cables that come with Apple devices are not particular strong and can be a little delicate. The Kanex MiColor ChargeSync USB cable with LED Lightning Connector comes in Silver to complement the color of the latest iPhones. The cable is braided with nylon fiber, which makes it slightly thicker and stronger and is durable for everyday use.
January 25, 2021
Photowall Home Decor custom sized canvas print

We love using Photowall products from wall murals, wallpaper, and prints to make different spaces in our home look vibrant and unique. Photowall is a wall-art company based in Sweden. They are passionate about creating inspiring living spaces with personality. Their website is constantly updated with beautiful designs to suit everyone's taste.
October 14, 2012
Command 3M hooks
I like using Command Traditional 3M hooks because there are easy to use and handy to organize many things around our home.
Having proper reliable tools help us to stay organized. With Command 3M hooks we can organize and decorate without damaging the walls. There are so many possibilities on how we can use these hooks. The hooks work on all types of surfaces i.e. painted surfaces, wood, tiles and more. I placed the Command Traditional hook behind the washroom door to hang towels, and like how strong the hooks are, as it can hold up to 5 pounds.
It is easy to use the Command Traditional medium hook to hang seasonal and holiday decorations i.e. novelty lights, streamers, balloons. We can remove the hooks when we no longer need it, and save it for next time. This medium hooks can hold up to 3 pounds.
The hooks can be easily removed without damaging the walls. The hooks don't leave holes or tacky oily residue that affects the paint. 3M's patented stretch release adhesive technology is strong, secure and damage free.
To remove, slide the hook up and pull the tab about 12" straight down and then release the base from the wall. The hooks come with two strips. When we no longer need the hook in the initial place we put, remove, clean the back with rubbing alcohol (don't use any other type of cleaners), dry the hook and attach the strip with the red adhesive liner to the hook and the black adhesive liner to the wall. Ones we put the hook on the surface, we have to press firmly for 30 seconds and then let it stay for an hour before hanging anything.
All rights reserved on written content and mentioned photographs Createwithmom © 2012. Please Ask First
November 14, 2014
Sky Zone Opens In Vaughan
The hugely popular Sky Zone Indoor Trampoline Park opened its third and largest GTA location in Vaughan. With over 36,500 sq. ft. of space, the brand new facility features four party rooms, and activities like Ultimate Dodgeball, SkySlam (an awesome take on basketball that allows anyone to slam dunk like a pro), Foam Zone pit to jump into, and an all new Ultimate Volleyball experience unlike any other.
February 5, 2014
Our Completed DIY Modern, Eco-Friendly #BathroomReno
We started a #BathroomReno project in the beginning of November, as a weekend and some days in the evening type of project. Having one full washroom and a powder room in our home is not convenient for a growing family like us, so instead of moving to a bigger home we wanted to upgrade ours to accommodate all the family members.
Subscribe to:
Comments (Atom)

