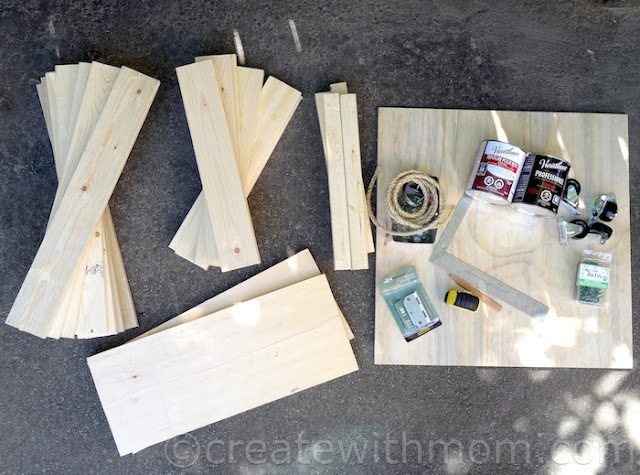
We are very excited to be part of the Rust-Oleum and Varathane #LoveYourWood Challenge. For this challenge, we were provided with a gift card to purchase our choice of wood and any other material we needed for the project. Our surprise package included a Varathane Top Coat, a Varathane Wood Stain, glass pebbles, cabinet door handle, hook, wire, and rope.
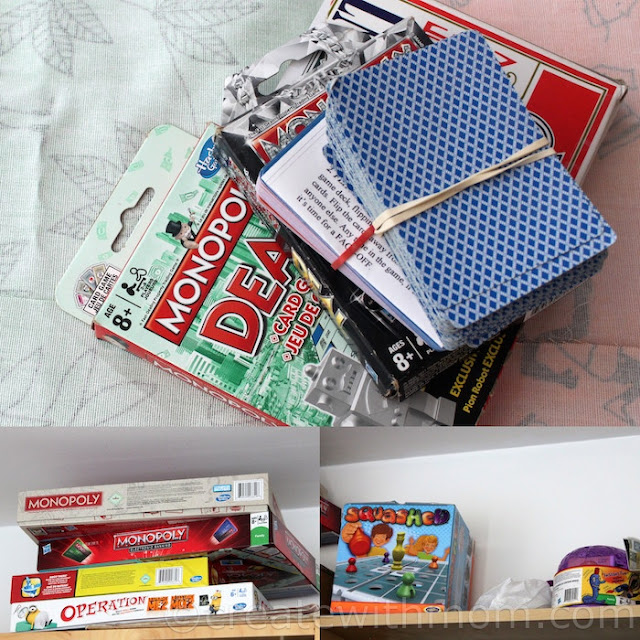
We brainstormed lots of ideas, and settled to make something our family needed. My family and I love playing board games and we have a lot of games all over our home. Before making our Convertible Portable Gaming Storage Cart we had the games on top of cupboards in different parts of our home, which was not accessible for our children. Now, having the games in one place is not only inspiring for us to play often, but also convenient as it can be easily kept in the family living room instead of fetching the games from all over the place.
We used all the materials that came in our surprise package, and made this functional game storage cart that is not only portable because of the wheels and handles we inserted, but also convertible to be either a seat or a place to keep the games and play around it.
To make your own Convertible Portable Gaming Storage Cart you will need...
1pcs 2x2x8 wood
4pcs 1x4x8 wood
2pcs 1/2 x2’x2’ plywood for the top and base
Circular saw or any saw for cutting straight wood
1 1/2" Screws
Drill and appropriate drill bits
Carpenters square
Safety Glasses
Wood glue
Wood filler
Random orbit sander and or sandpaper
2 - 2” Swivel casters with stops
2 - 2” regular casters
Circular saw or any saw for cutting straight wood
Drill and appropriate drill bits
Carpenters square
Safety Glasses
Wood filler
Varathane Top Coat
Varathane Wood Stain
Accessory materials: glass pebbles, cabinet door handle, hook, wire, and rope
Glow in the Dark Mod Podge
Glow in the Dark Mod Podge
Before building the game storage cart, we gathered all our board games and stacked it to get an estimate of the height and width that would work for us. We made sure the games could be stored horizontally or vertically.
First we started doing all the cuts with a circular saw. You could use any saw as long as they do straight edge cuts. Once all the cut pieces were in place we started assembling the cart.
Cut List
8 pcs 1x4@18” (short end)
8 pcs 1x4@24” (long end)
4 pcs 2x2@16” (corner end)
2 pcs 1/2” plywood 24"x 20” (bottom and top cover)
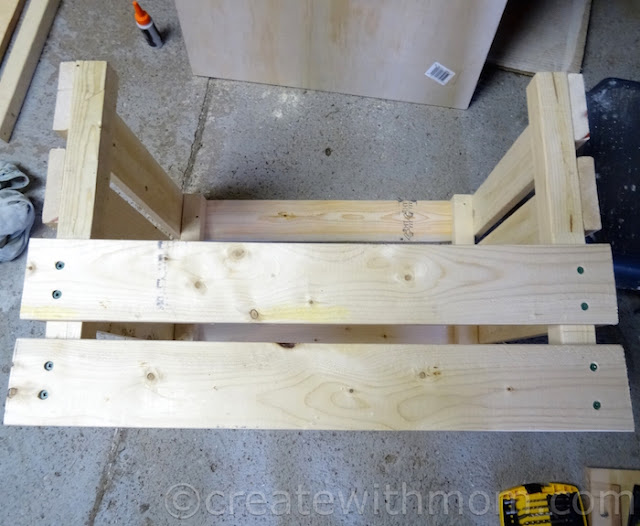
We started building the 2 side panels. Using wood glue, we placed 2 - 2x2’s parallel to each other and started placing the 4 - 1x4’s by leaving even gaps. Then we used 4 screws to secure each board. Repeat this process for the second side panel.
First we started doing all the cuts with a circular saw. You could use any saw as long as they do straight edge cuts. Once all the cut pieces were in place we started assembling the cart.
Cut List
As shown in the picture we placed both side panels upright and used a square to make sure they were properly aligned. We then started securing the long ends. Once both long ends were complete we were happy how the gaming cart was taking shape.
Since this cart will be used mostly by our kids, we made sure there would be no screws or sharp edges sticking out. We pre-drilled the screw holes slightly so that the screw head would be snug inside the wood, which we filled up using wood filler and sanded.
We used a piece of plywood to close the bottom of the cart, and installed two swivel casters on one end and regular casters on the other.
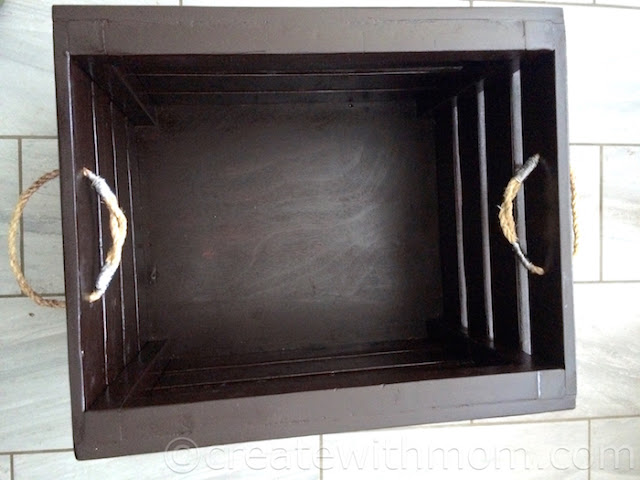
Using a staining brush, we stained the gaming cart with the Black Cherry Varathane Wood Stain.
After the wood stain dried, we used the Varathane Matte Finish Clear Top Coat to protect the stain. When using the wood stain and top coat, do it in a well ventilated area because the fumes are a little strong.
For the handles, we drilled two holes on the top boards of each side panel before staining. After the stain and top coat dried, we put an equally measured piece of rope to both sides, and used the stainless steel wire that came in the surprise package to secure the handles.
For the cover: We initially wanted to use 2 hinges to attach the cover, but dropped that idea, as we wanted the lid to be used in different ways such as a gaming board, an accent piece as well as a seat. We attached 2 pieces of 2x2 to the top edge of each long end to properly rest the lid.
We stitched a seat using a foam board that we had and covered it using a playful material we found at Ikea for the seat.
For the cushion we used:
A padded foam
Cloth
Sewing Machine
Needle and Thread
This padded cushion fits perfectly over the game cart, and makes a comfy place to sit.
We attached the brass cabinet door handle that came in the surprise package to the lid, so we can easily lift the cover to either remove it to take the games or turn it over for the seat. My kids helped glue the glass beads to the cover using Modge Podge.
We attached the hook inside one of the long ends, so we can hang some of the games that come in pouches and cards so we can easily take it out.
We used all the five accessories that came in the surprise package to be both functional and decorative.
Vote and Win
By voting for us at the Varathane Facebook Page everyday until August 31st, you can win your own Varathane prize pack :)
Click on the button that is on the left hand side of our image and press submit on the bottom of the page. You can vote once per day :)
By voting for us at the Varathane Facebook Page everyday until August 31st, you can win your own Varathane prize pack :)
Click on the button that is on the left hand side of our image and press submit on the bottom of the page. You can vote once per day :)
Thank you everyone for your support!


Voted today and will try to remember everyday until the end. Best of luck.
ReplyDeleteThank you Tanya I really appreciate it :)
DeleteDone! Very neat!
ReplyDeleteThank you Amy :)
DeleteVoted again today :)
ReplyDeleteThank you Cheryl you remembered :) I appreciate it
DeleteI love it,voted
ReplyDeleteVoted :) Good Luck to you!
ReplyDeletevoted, very cool project
ReplyDeleteVoted.. Good luck.
ReplyDeleteThank you Angela, Kathy, Linda and Heather I really appreciate the support :)
ReplyDeleteyou are getting my daily vote!
ReplyDeleteThank you Debbie :) I really appreciate it
DeleteVoted for you
ReplyDeleteThank you Amy :)
Deleteyou definitely have my vote!!! I wanna do something like this for my foyer!
ReplyDeleteVery Nice. I voted for you.
ReplyDeleteFlorence C
You did a very nice job your project looks great!
ReplyDeleteThat's a nice item you created. I just might use some of your ideas for something I build.
ReplyDeleteThank you Krisha, Florence, Anna and Gord. @Krisha and Gord glad to inspire
ReplyDeleteGreat project, I like anything that is useful and offers extra storage! So nice looking too. I voted, good luck!
ReplyDeletei voted!
ReplyDeletevoted again
ReplyDeleteI voted!!! Love this project!!!
ReplyDeleteOh wow! How awesome! I love the idea :) good luck!
ReplyDeleteVoting daily. It's in my list.
ReplyDeleteLove this idea!!!! Thank you . I voted today.
ReplyDeleteThank you Erica, Ivy, Debbie, Kristen, Suzie, Stephanie and Wanda I appreciate it
ReplyDeleteI am still voting daily!
ReplyDeleteWell done dear. You did great job. I am going to vote for you. All the best :)
ReplyDeleteDone - good luck!
ReplyDeleteGave you a vote and what a great place for ideas!Good luck
ReplyDelete